(Adjusted the floor designations above the Pokemon lists to account for the first floor of the Grand Stairway. B1F should be the area the player encounters Eclipse and Aster abducting Victoria.) Tag: Visual edit |
(→Items) |
||
| (14 intermediate revisions by 4 users not shown) | |||
| Line 1: | Line 1: | ||
| − | The Grand |
+ | The Grand Stairway is an area located underneath the [[North Obsidia Ward]]. |
| + | ==Special Encounters== |
||
| − | == In the game == |
||
| + | ===Sun and Moon=== |
||
| + | On the small northeast ledge of floor B3, accessible by taking the southeast tunnel of floor B3, there's a static Solrock or Lunatone the player can fight and catch. The one not found under the Grand Stairway can be found later in Tanzan Mountain. |
||
== Items == |
== Items == |
||
{{ItemListStart|cave}} |
{{ItemListStart|cave}} |
||
| − | {{ItemList|Mining Kit|Received from hiker}} |
+ | {{ItemList|Mining Kit|Received from hiker in room north of B1 (requires Rock Smash)}} |
| + | {{ItemList|Ghost Gem|Hidden in a rock directly southwest of the ladder upon entering floor B1}} |
||
| + | {{ItemList|Dire Hit|South then east of the ladder upon entering floor B2}} |
||
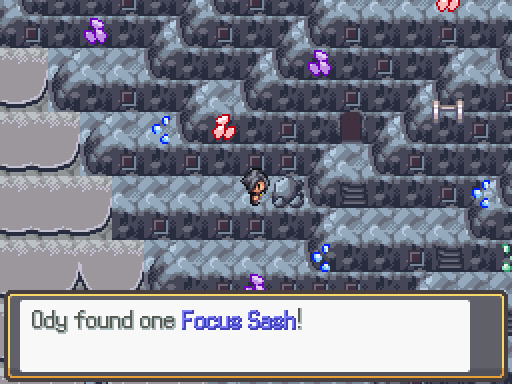
| + | {{ItemList|Focus Sash|Hidden in a rock halfway down the ledge jumps on floor B3, on the right side}} |
||
| + | {{ItemList|Rare Candy| |
||
| + | *Hidden next to a crumbling rock below the far-left ledge jumps of B2 (requires Rock Smash) |
||
| + | *Hidden in a rock blocked by two crumbling rocks in the east tunnel of floor B3 (requires Rock Smash)}} |
||
| + | {{ItemList|TM63 (Embargo)|Left of the stairs leading up to the Black Belt on floor B2}} |
||
| + | {{ItemList|TMX7 (Rock Smash)|Given by the Black Belt at the top of the west stairs on floor B2}} |
||
| + | {{ItemList|Blue Shard|Hidden in a rock southeast of the Black Belt on floor B2}} |
||
| + | {{ItemList|Green Shard| |
||
| + | *Hidden in rock south of the ladder upon entering the Grand Stairway |
||
| + | *Hidden in rock down the middle-left ledge jump on floor B2, by the pillar |
||
| + | *Hidden in rock at the north end of floor B1 (Requires Rock Smash)}} |
||
| + | {{ItemList|Great Ball|Hidden in rock on the right side of the stairs accessible from the middle-left ledge jumps of B2}} |
||
| + | {{ItemList|PokeSnax|Hidden in small pool of water at the top of the stairs leading back to the entrance of floor B2, behind the support beam}} |
||
| + | {{ItemList|X Speed|Hidden on the ground on the right side of the stairs leading back up to the entrance of floor B3}} |
||
| + | {{ItemList|Guard Spec.|Hidden in a rock southeast of the ledge jumps on floor B2}} |
||
| + | {{ItemList|X Sp. Atk|Hidden in rock beside ladder by following middle-right ledge jumps of B2}} |
||
| + | {{ItemList|Star Piece|Hidden in a rock above the ladder after arriving in the southeast B3 tunnel}} |
||
| + | {{ItemList|Field Notes|Inside the crystal chamber in the southeast B3 tunnel, accessible if a Pokemon (wild or caught) uses a move such as Magntitude or Bulldoze in battle within the room|field=Crystal Cavern}} |
||
| + | {{ItemList|Ability Capsule|Halfway up the east side of floor B2, reached after following the southeast B3 tunnel}} |
||
| + | {{ItemList|Magical Seed|In the small B2 room, after following the southeast B3 tunnel}} |
||
| + | {{ItemList|Heart Scale|Hidden in a rock next to the upwards ladder in the small B2 room, after following the southeast B3 tunnel}} |
||
| + | {{ItemList|Red-Hots|Hidden in rock on east side of floor B2, just before jumping down ledge. Accessible by following the southeast B3 tunnel}} |
||
| + | {{ItemList|Ground Gem|Hidden in rock in the tunnel west B1 tunnel, accessible from the far-left ledge jumps of B2}} |
||
| + | {{ItemList|Super Repel|Hidden in rock at northwest side of B1, accessible from the far-left ledge jumps of B2}} |
||
| + | {{ItemList|Red Shard|Hidden in rock down blocked ladder found west upon entering floor B2 (requires Rock Smash)}} |
||
| + | {{ItemList|Amplifield Rock|In room down blocked ladder found west upon entering floor B1 (requires Rock Smash)}} |
||
| + | {{ItemList|PP Up|Hidden on the ground northwest upon entering Mining Kit room}} |
||
{{ItemListEnd|cave}} |
{{ItemListEnd|cave}} |
||
| + | |||
| + | [[File:Focussash1.png|270x270px]] |
||
== Pokémon == |
== Pokémon == |
||
| − | === |
+ | === Floor B1 - Entrance === |
{{Catch/header|cave|no}} |
{{Catch/header|cave|no}} |
||
{{catch/entry|027|Sandshrew|Cave|22-26|type1=Ground|all=30%}} |
{{catch/entry|027|Sandshrew|Cave|22-26|type1=Ground|all=30%}} |
||
| Line 18: | Line 51: | ||
{{catch/entry|433|Chingling|Cave|21-25|type1=Psychic|all=8%}} |
{{catch/entry|433|Chingling|Cave|21-25|type1=Psychic|all=8%}} |
||
{{catch/entry|714|Noibat|Cave|22-26|type1=Flying|type2=Dragon|all=20%}} |
{{catch/entry|714|Noibat|Cave|22-26|type1=Flying|type2=Dragon|all=20%}} |
||
| + | {{catch/footer}} |
||
| + | === Floor B2 - Ledges === |
||
| + | {{Catch/header|cave|no}} |
||
| + | {{catch/entry|027|Sandshrew|Cave|22-26|type1=Ground|all=30%}} |
||
| + | {{catch/entry|050|Diglett|Cave|23-26|type1=Ground|all=10%}} |
||
| + | {{catch/entry|074|Geodude|Cave|22-26|type1=Rock|type2=Ground|all=15%}} |
||
| + | {{catch/entry|075|Graveler|Cave|22-27|type1=Rock|type2=Ground|all=25%}} |
||
| + | {{catch/entry|201|Unown|Cave|25-40|type1=Psychic|all=5%}} |
||
| + | {{catch/entry|206|Dunsparce|Cave|33-38|type1=Normal|all=5%}} |
||
| + | {{catch/entry|433|Chingling|Cave|23-25|type1=Psychic|all=10%}} |
||
| + | {{catch/div|cave|Special}} |
||
| + | {{catch/entry|337|Lunatone|Small B2 room|28|all=One (50%)|type1=rock|type2=Psychic}} |
||
| + | {{catch/entry|338|Solrock|Small B2 room|28|all=One (50%)|type1=rock|type2=Psychic}} |
||
{{Catch/footer|cave}} |
{{Catch/footer|cave}} |
||
| − | === |
+ | === Floor B3 - Caves === |
{{Catch/header|cave|no}} |
{{Catch/header|cave|no}} |
||
{{catch/entry|027|Sandshrew|Cave|22-26|type1=Ground|all=30%}} |
{{catch/entry|027|Sandshrew|Cave|22-26|type1=Ground|all=30%}} |
||
| Line 29: | Line 75: | ||
{{catch/entry|433|Chingling|Cave|23-25|type1=Psychic|all=10%}} |
{{catch/entry|433|Chingling|Cave|23-25|type1=Psychic|all=10%}} |
||
{{Catch/footer|cave}} |
{{Catch/footer|cave}} |
||
| − | === |
+ | === Floor B3 - Gate === |
{{Catch/header|cave|no}} |
{{Catch/header|cave|no}} |
||
{{catch/entry|201|Unown|Cave|20-45|type1=Psychic|all=100%}} |
{{catch/entry|201|Unown|Cave|20-45|type1=Psychic|all=100%}} |
||
Revision as of 17:20, 15 August 2020
The Grand Stairway is an area located underneath the North Obsidia Ward.
Special Encounters
Sun and Moon
On the small northeast ledge of floor B3, accessible by taking the southeast tunnel of floor B3, there's a static Solrock or Lunatone the player can fight and catch. The one not found under the Grand Stairway can be found later in Tanzan Mountain.
Items
Template:ItemListStart Template:ItemList Template:ItemList Template:ItemList Template:ItemList Template:ItemList Template:ItemList Template:ItemList Template:ItemList Template:ItemList Template:ItemList Template:ItemList Template:ItemList Template:ItemList Template:ItemList Template:ItemList Template:ItemList Template:ItemList Template:ItemList Template:ItemList Template:ItemList Template:ItemList Template:ItemList Template:ItemList Template:ItemList Template:ItemList Template:ItemListEnd
Pokémon
Floor B1 - Entrance
| Pokémon | Location | Levels | Rate | |||||||
|---|---|---|---|---|---|---|---|---|---|---|
|
|
22-26 | 30% | |||||||
|
|
23-26 | 10% | |||||||
|
|
22-26 | 10% | |||||||
|
|
22-28 | 21% | |||||||
|
|
35-38 | 1% | |||||||
|
|
21-25 | 8% | |||||||
|
|
22-26 | 20% | |||||||


Floor B2 - Ledges
| Pokémon | Location | Levels | Rate | |||||||
|---|---|---|---|---|---|---|---|---|---|---|
|
|
22-26 | 30% | |||||||
|
|
23-26 | 10% | |||||||
|
|
22-26 | 15% | |||||||
|
|
22-27 | 25% | |||||||
|
|
25-40 | 5% | |||||||
|
|
33-38 | 5% | |||||||
|
|
23-25 | 10% | |||||||
| cave | ||||||||||
|
|
28 | One (50%) | |||||||
|
|
28 | One (50%) | |||||||


Floor B3 - Caves
| Pokémon | Location | Levels | Rate | |||||||
|---|---|---|---|---|---|---|---|---|---|---|
|
|
22-26 | 30% | |||||||
|
|
23-26 | 10% | |||||||
|
|
22-26 | 15% | |||||||
|
|
22-27 | 25% | |||||||
|
|
25-40 | 5% | |||||||
|
|
33-38 | 5% | |||||||
|
|
23-25 | 10% | |||||||
Floor B3 - Gate
| Pokémon | Location | Levels | Rate | |||||||
|---|---|---|---|---|---|---|---|---|---|---|
|
|
20-45 | 100% | |||||||
Trainers
Aster and Eclipse are battled in a Cave Field in a Double Battle format and they have two Super Potions. You fight alongside Victoria.
|
|||||||||||||||||||||||||||||||||||||||||||||||||||||||||||||||||||||||||||||||||||||||||||||||||||||||||||||||||||||||||||||||||||||||||||||||||||||||||||||||||||||||||||||||||||||||||||||||||||||||||
| |||||||||||||||||||||||||||||||||||||||||||||||||||||||||||||||||||||||||||||||||||||||||||||||||||||||||||||||||||||||||||||||||||||||||||||||||||||||||||||||||||||||||||||||||||||||||||||||||||||||||


Trivia